型號:CZ80
容量:32 GB
支援介面:USB 3.0 並向下相容
測試軟體:CrystalDiskMark3.0.3b
測試條件:100 MB
於電腦的 USB 3.0 介面測試結果:
![[隨身碟測試報告] SanDisk CZ80 32GB USB 3.0 測速](http://pic.pimg.tw/genlee/1403023103-4027855417.jpg?v=1403023104)
於電腦的 USB 2.0 介面測試結果
![[隨身碟測試報告] SanDisk CZ80 32GB USB 3.0 測速](http://pic.pimg.tw/genlee/1403023104-4260553696.png)

介紹 Synology NAS, 汽車, 美食, 3C, 單眼相機, DSLR, 雷射, Windows, 程式語言, 財務金融等相關知識
於電腦的 USB 3.0 介面測試結果:
![[隨身碟測試報告] SanDisk CZ80 32GB USB 3.0 測速](http://pic.pimg.tw/genlee/1403023103-4027855417.jpg?v=1403023104)
於電腦的 USB 2.0 介面測試結果
![[隨身碟測試報告] SanDisk CZ80 32GB USB 3.0 測速](http://pic.pimg.tw/genlee/1403023104-4260553696.png)
除了可透過 Wifi、以 android / iOS 手機控制相機拍照,還可以直接上傳到網路相簿,
但是購入之後,搜尋 google 許多次,看過許多文章,也看到了很多說法,
主要的說法有兩套,即:
「其實只能上傳到 Canon Image Gateway 相簿」
「在台灣買公司貨,不支援上傳到 Canon Image Gateway 功能」。
安裝了光碟裡附的 Canon EOS Utility 後,發現多了一個「Set Up Web Services」功能,
但是連接相機到電腦後、執行這個功能一直失敗,出現錯誤訊息:
「this function cannot be used because your country/region is not supported by the Canon Image Getaway service」
遍尋 google 上搜尋到的結果,頂多只看到幾篇官方的國外 manual,但是我連執行功能都沒辦法,要怎麼做下一步?
最後,我自己找到了解決的方法,在這裡寫一下,怕以後自己忘記:
Step 0:到 Canon Image Gateway 網站註冊帳號,按此到網站
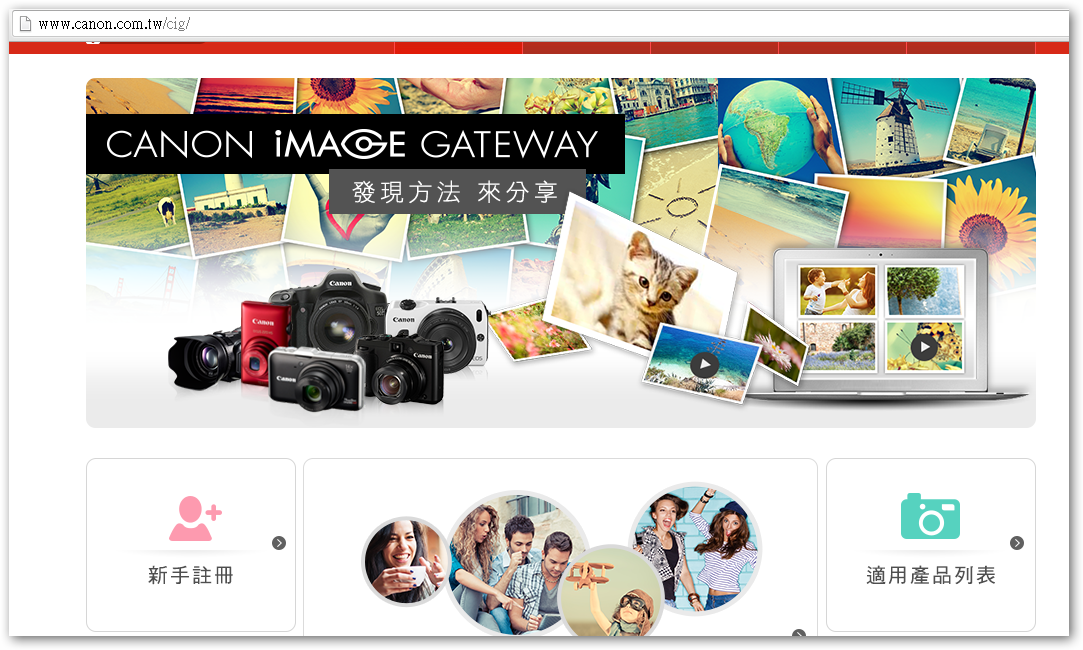
Step 1:按上圖、左下角的「新手註冊」,進行帳號註冊。
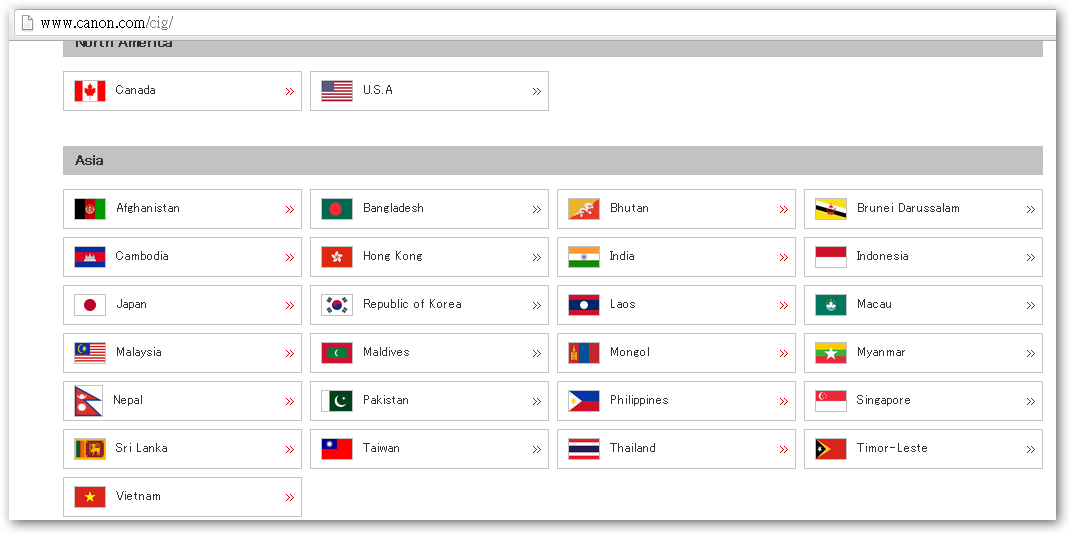
Step 2:在國家選擇的網頁,選擇您的國家,我選 Asia 裡的 Taiwan。
Step 3:跟著畫面進行註冊,直到註冊完成。
Step 4:這是最重要的一步,到官方下載 EOS Utility 新版軟體,按此下載
光碟附的是舊的!會有「this function cannot be used because your country/region
Step 5:安裝下載下來的 Canon EOS Utility 2
Step 6:開啟相機電源
Step 7:將 USB 線,連接相機與電腦
Step 8:執行 Canon EOS Utility
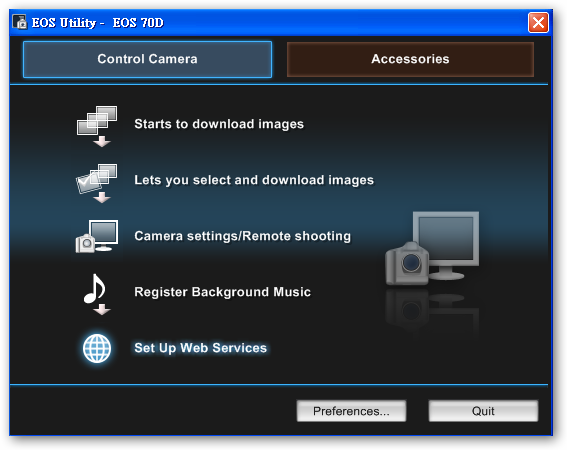
Step 9:若是相機成功地與電腦連接,「Set Up Web Services」功能即被 Enable。點 Set Up Web Service。
Step 10:成功進來這個畫面了!
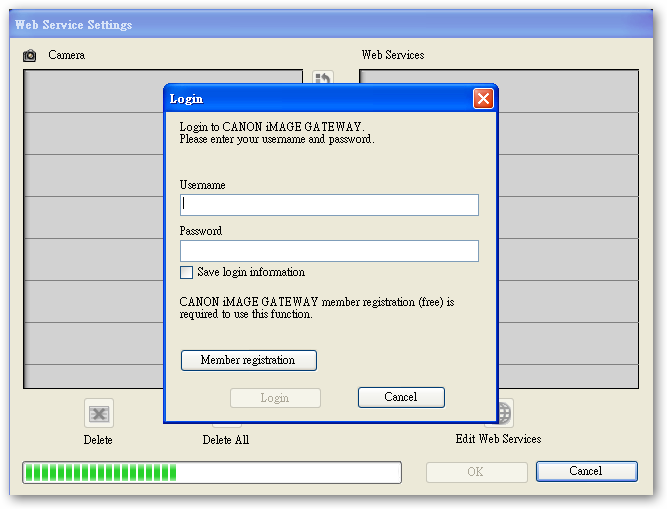
Step 11:登入一開始註冊的帳號後,就可以按右下角的「Edit Web Services」進行服務的設定了。
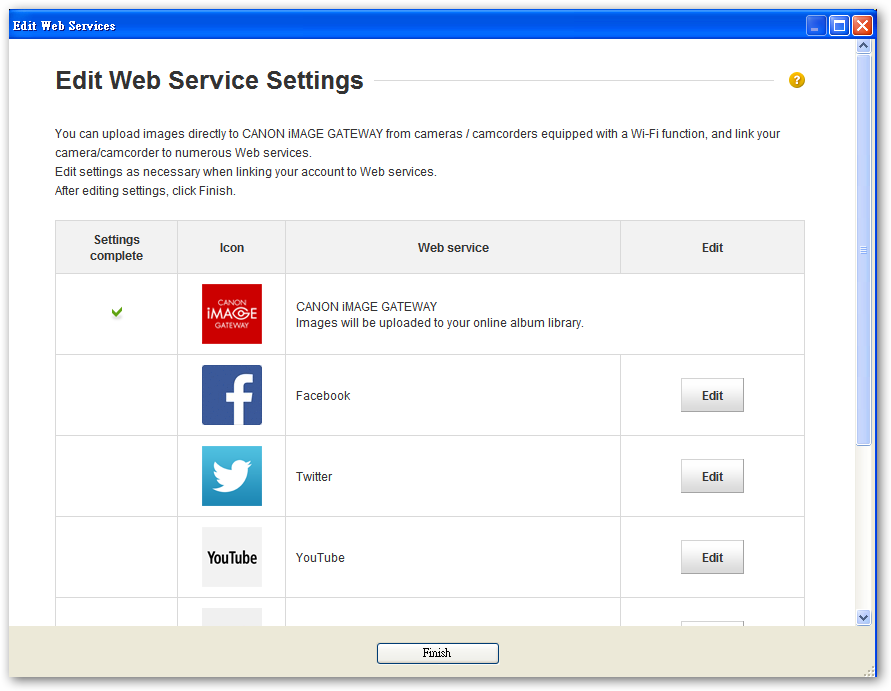
可以在想安裝的服務,按下右邊的 Edit 按鈕進行設定。
例如按下 Facebook 右邊的 Edit 按鈕後,會導向至這個畫面,讓我們進行設定:
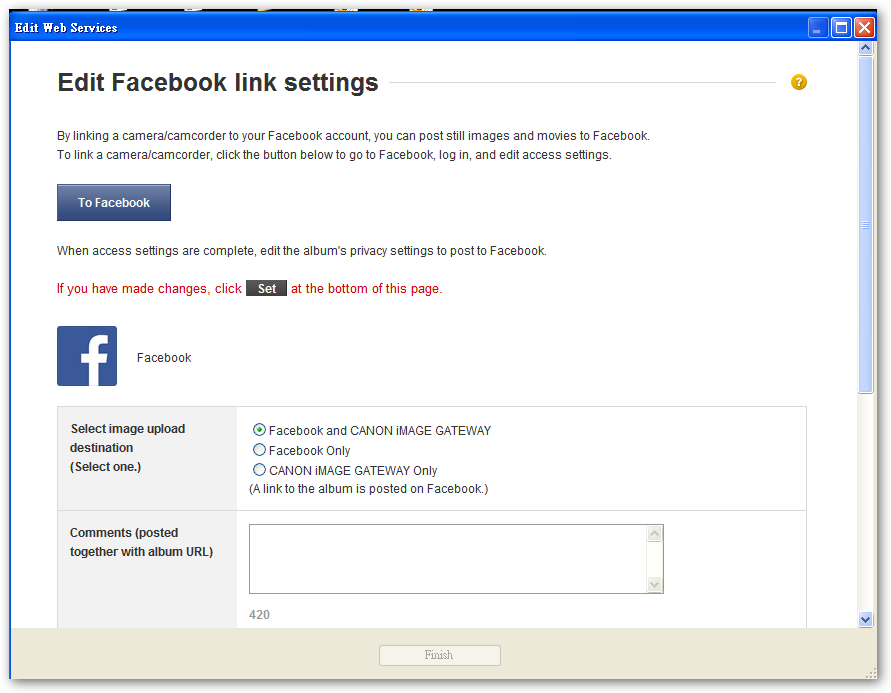
Step 12:跟著畫面設定完後,就會新增一項服務於右邊選單中。
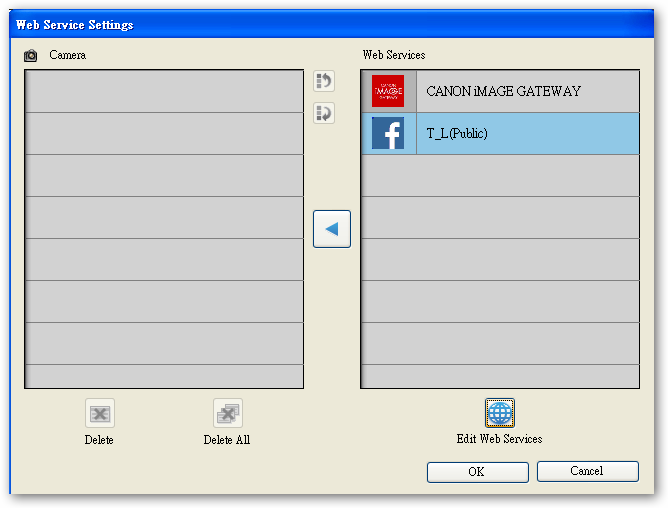
Step 13:設定完所有想安裝的服務後,如下圖
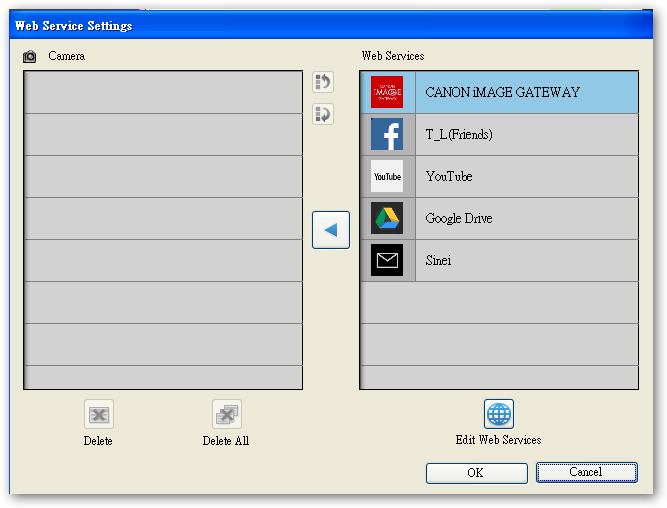
Step 14:最後,記得按中間的「←」按鈕,把他們安裝到相機裡面!然後按右下角的 OK 按鈕。
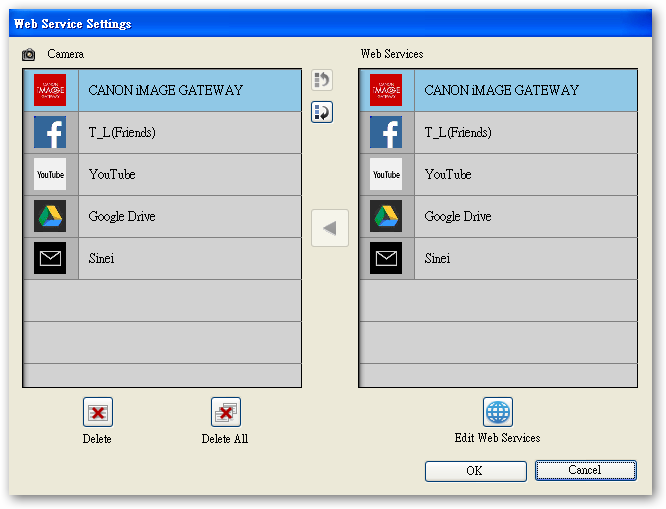
Step 15:拔掉 USB,完成安裝!以後按相機 Wifi 功能裡的地球圖形,就可以進行這些分享功能了!
今天放假有空,特地弄個腳架、把步驟一步一步拍下來,
在這邊舉 Facebook 為例,步驟如下:
Step 1:開啟 Wi-Fi 後,進入 Wi-Fi 功能

Step 2:選「上傳至網路服務」
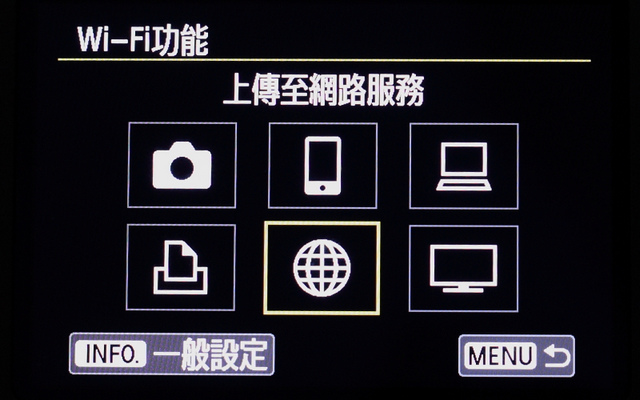
Step 3:選 Facebook
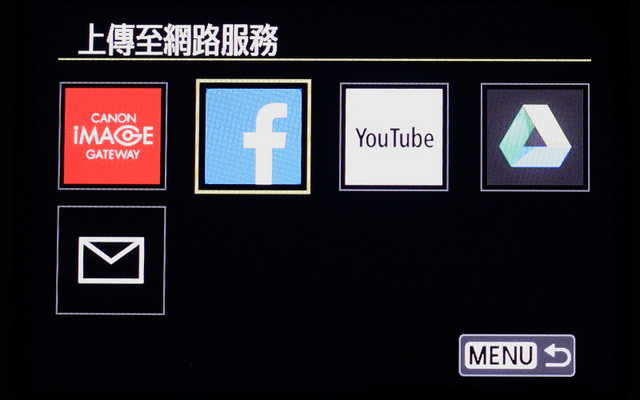
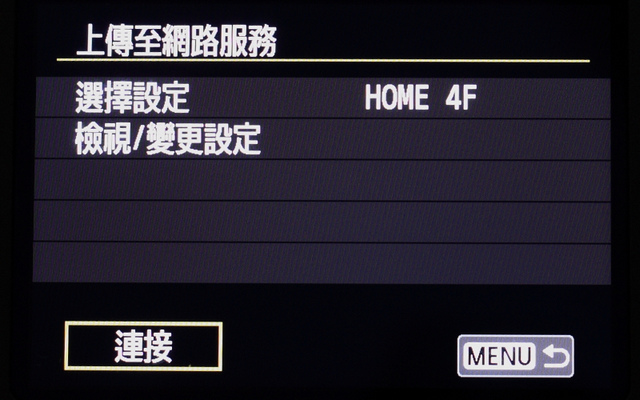
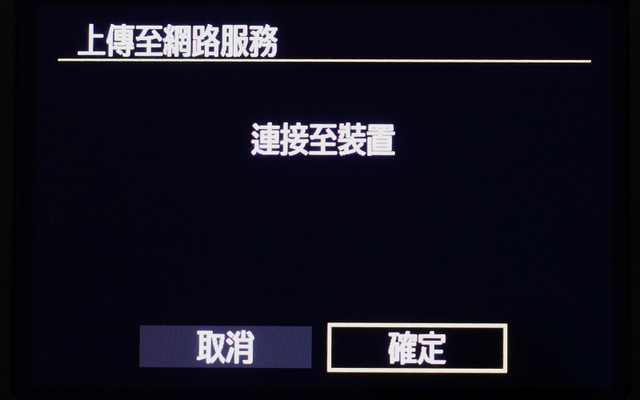
Step 4:選擇上傳照片時使用的網路環境設定,然後按「連接」。(我選家裡的 WiFi)
